
Getting Started
Inviting Team Members
Add colleagues to the platform so they can reply to customers and manage conversations alongside you.
Step 1 — Open Team Settings
Click Settings in the left sidebar. You'll land directly on the Team Settings page.
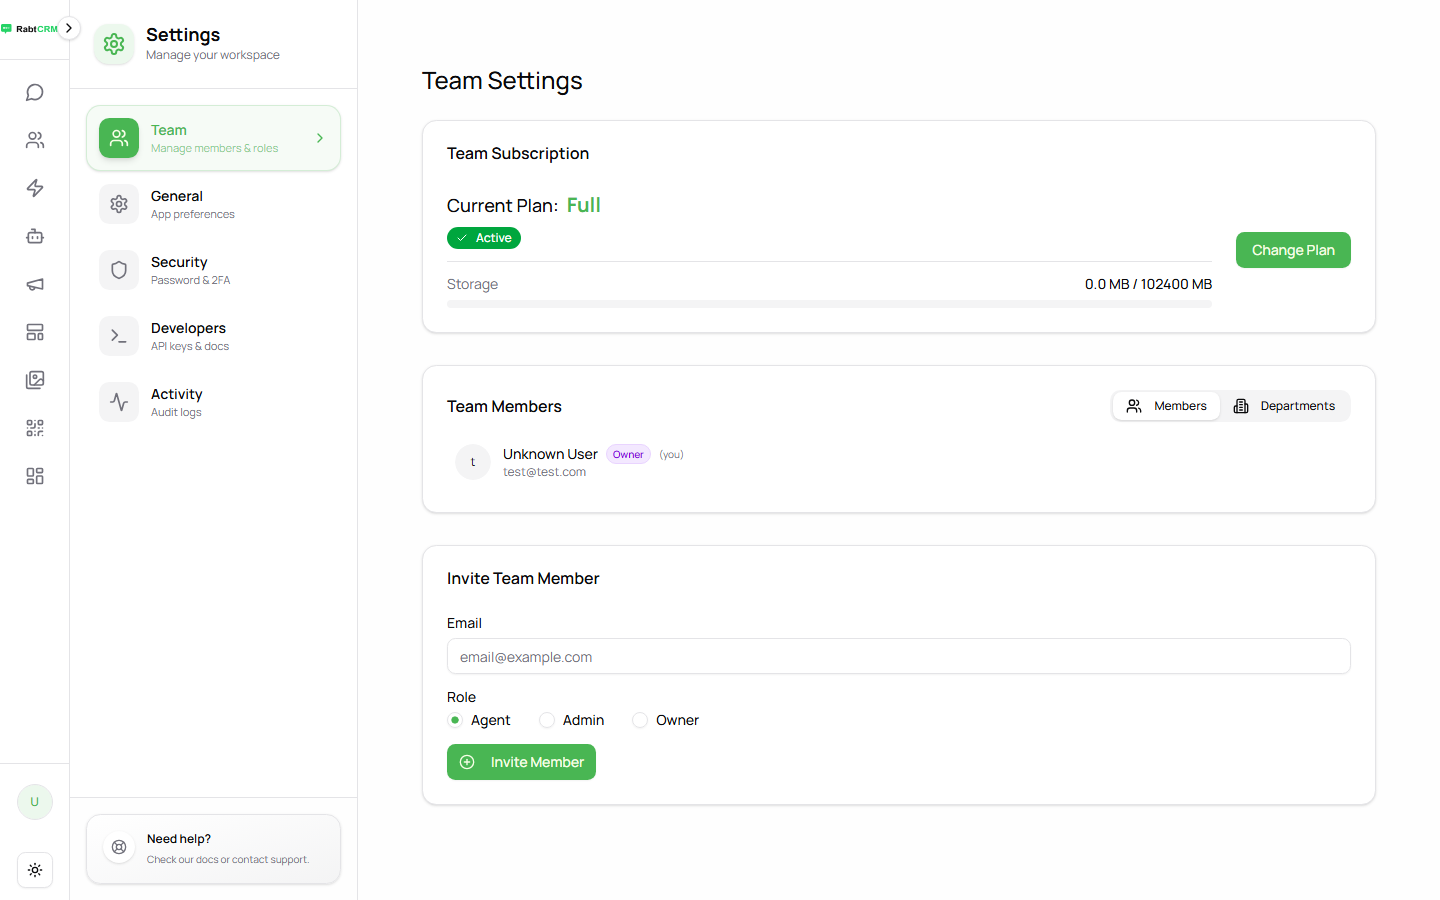
The page has two tabs:
- Members — all team members and their roles
- Departments — group members into departments (Sales, Support, etc.)
Step 2 — Invite a New Member
Click Invite Member at the top of the page.
In the dialog:
- Enter the colleague's email address
- Select their role
- Submit the invitation
They'll receive an email with a link to create their account and join your workspace.
Team Roles
| Role | Permissions |
|---|---|
| Owner | Full access — manage plan, members, and delete workspace |
| Admin | Manage members, settings, and instances |
| Agent | Reply to conversations only — no access to settings |
Tip: Assign the Agent role to customer service staff to prevent them from changing platform settings.
Step 3 — Managing Departments
From the Departments tab, create departments to organise your team (e.g. Sales, Technical Support).
Conversations can be assigned to an entire department rather than a single agent.
Step 4 — Managing Existing Members
From the Members tab you can:
- Change role — click a member's current role and select a new one
- Remove member — click the delete option next to their name
FAQ
How many members can I add? The limit depends on your subscription plan. Check Settings for your current plan details.
What happens when I remove a member? They immediately lose access, but past conversations are preserved.
Can agents see each other's conversations? This depends on your workspace settings — agents can be restricted to only see conversations assigned to them.